The Challenge
How might we enhance the experience around the Children's Museum while providing a fun, learning opportunity?
The children's museum of Atlanta is a large museum focused on creating an enjoyable experience with educational elements for children in elementary and middle school. In this project, we created an interactive tabletop for the Children's Museum of Atlanta in order to bring more attention and stay-time to the "Step up to Science" section of the museum. Embracing a curiosity-pursuing theme, we followed an iterative approach to create a heavily tactile, tabletop experience for children to create and solve puzzles and challenges while containing elements of multiple STEAM learning goals.
Time Frame: 5 Weeks
Skills: Experience Design, Interaction Design, Physical Prototyping, User Research
Read the full case study and design process here!
Concept Pitch
The Direction
"Can we combine a river metaphor with electrical current?"
This is what we asked when looking at possibilities. Understanding we would want stakeholder feedback before deciding on a singular form, we created a pitch and lo-fi animation for feedback from the administration of the museum. We were also looking to see if they were inspired by any possible forms or interactions to give us more guidance in a more well defined product.
Multiple Themes - Using multiple themes, this system would be able to touch many different areas, raising the metaphors the children could create once formally learning the subjects.
Wide Range of Learning Standards - Due to the age range in the museum, we hoped this could provide some level of learning and unique explorations for multiple ages.
Relatable Metaphors - Using rivers and water as a primary starting point, we believed this would allow users to more easily connect with a higher level topics, such as basic circuits.
Magic Interactions - We saw an opportunity to create a physical and solid interaction with concepts that were generally viewed as intangible. We hoped this would create a sense of wonder and excitement in children as they could explore such a concept.
Initial Prototype
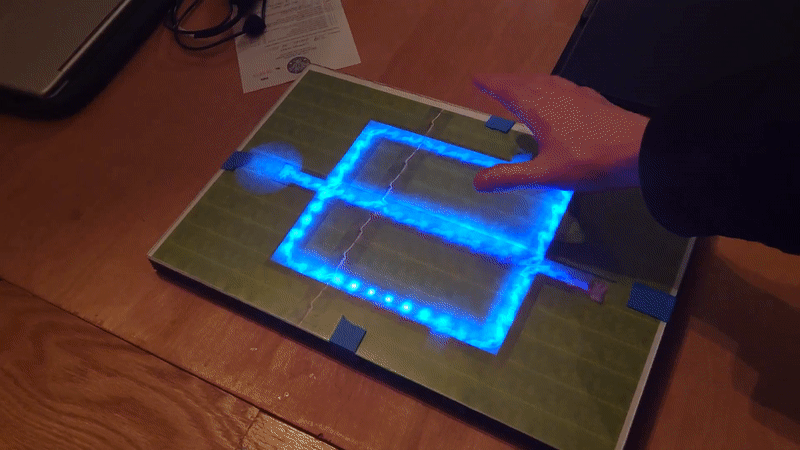
In order for our stakeholders to have a better understanding of what the children would experience, we created a lo-fi "acts like" model for our stakeholders to interact with. This model was created with an Arduino, custom capacitive sensors, and LED strips hidden underneath a printout and acrylic.

Final Iteration
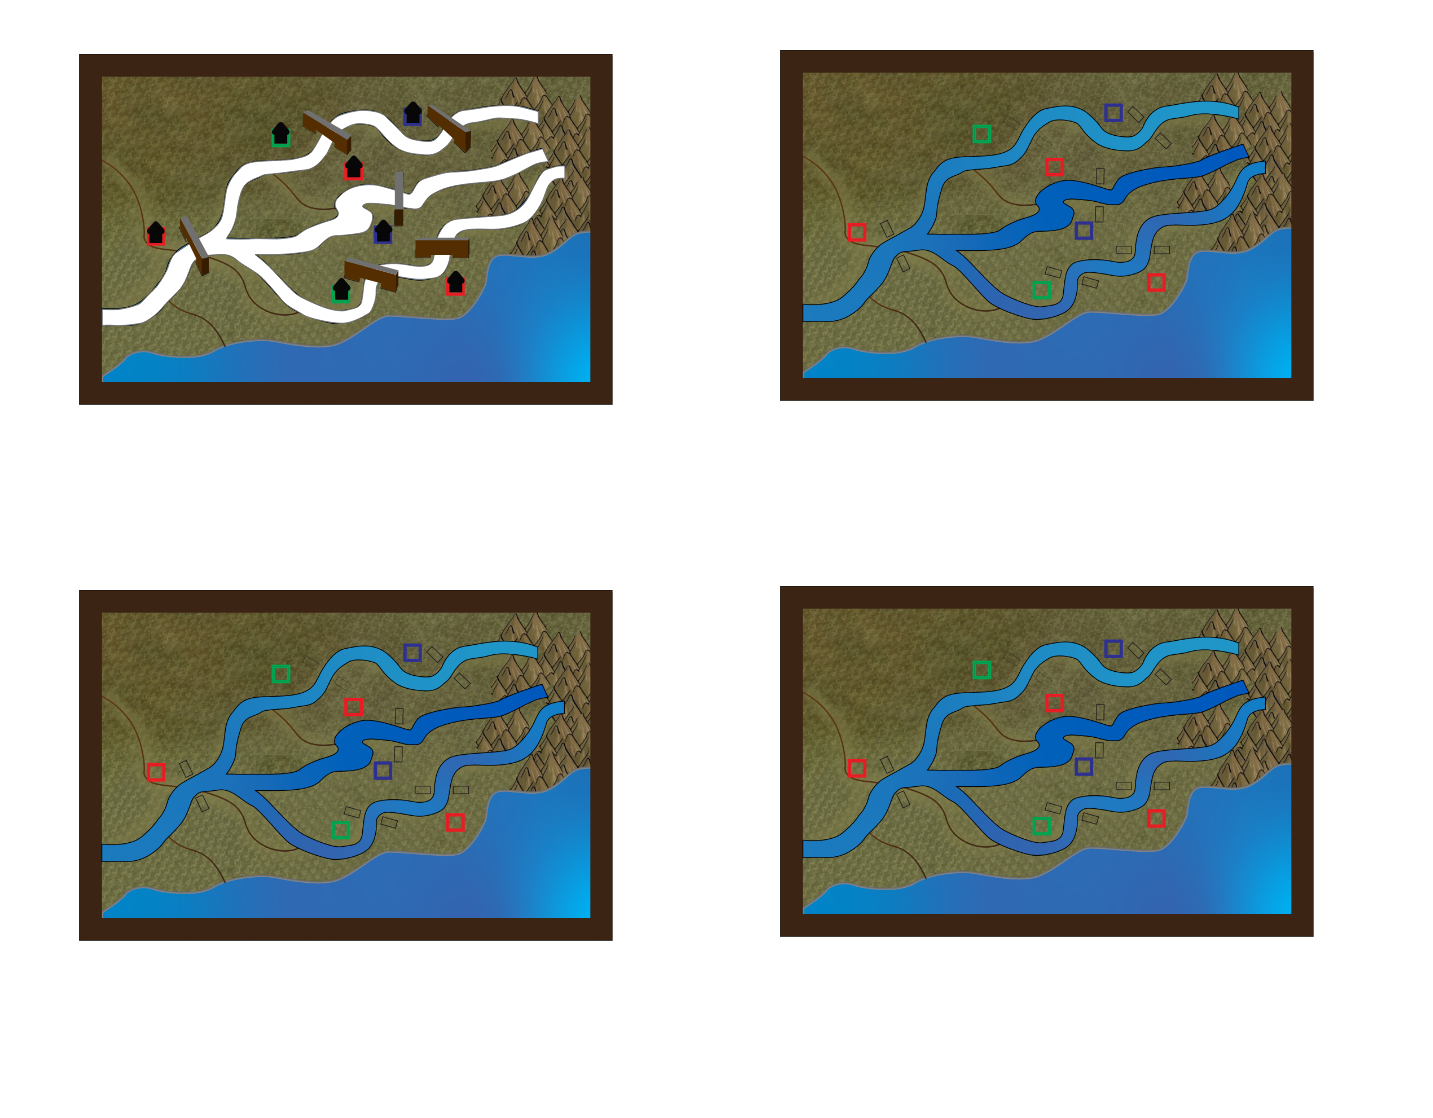
The Story
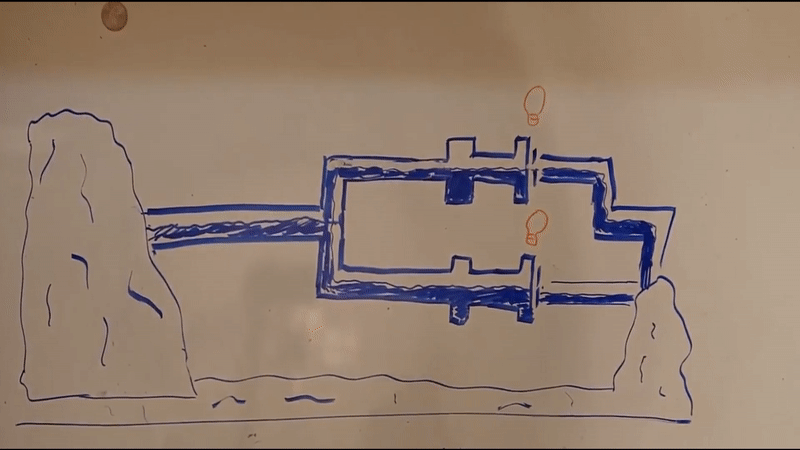
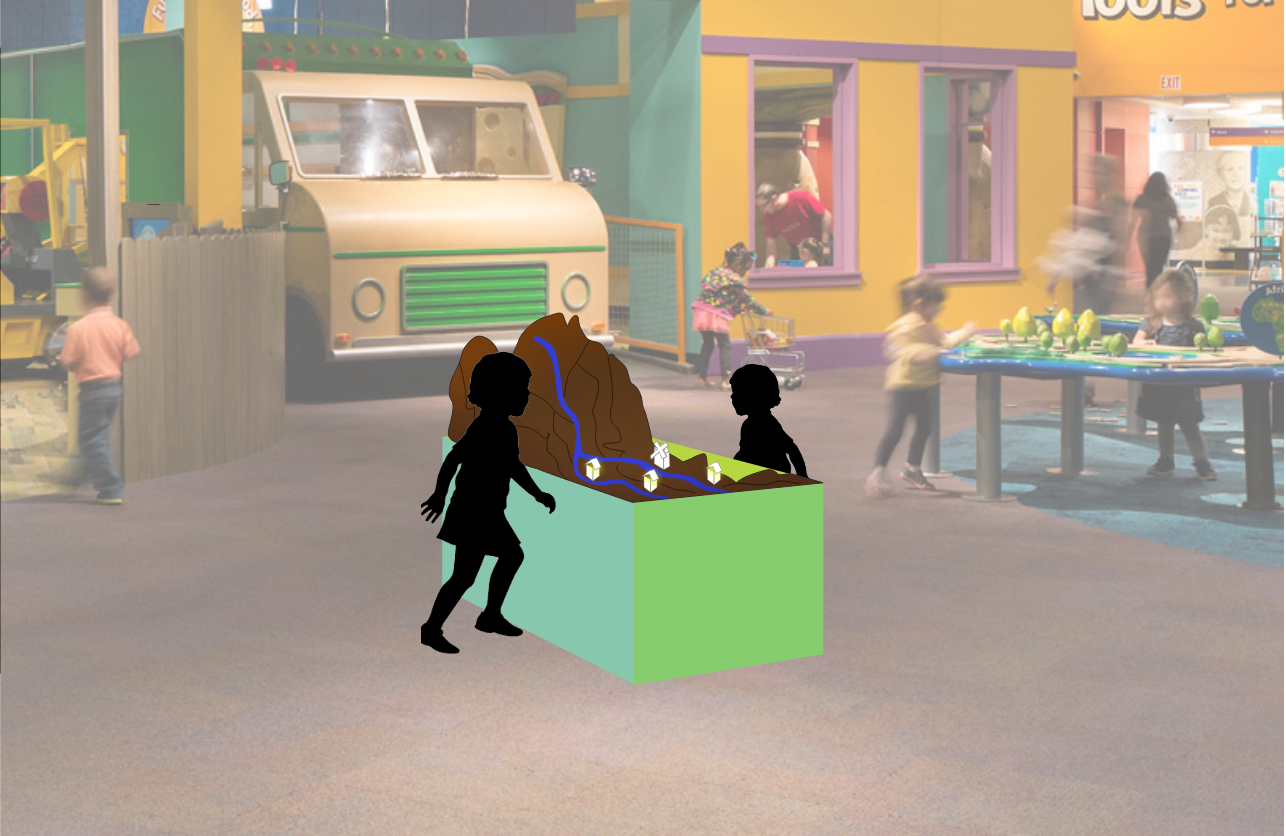
We chose to fully commit to the rivers and maps metaphors and evolved it into powering a series of towns from a limited water source. This allowed us to create a more story and puzzle inspired experience for the children to solve while thinking "why does this work?"
The Interaction
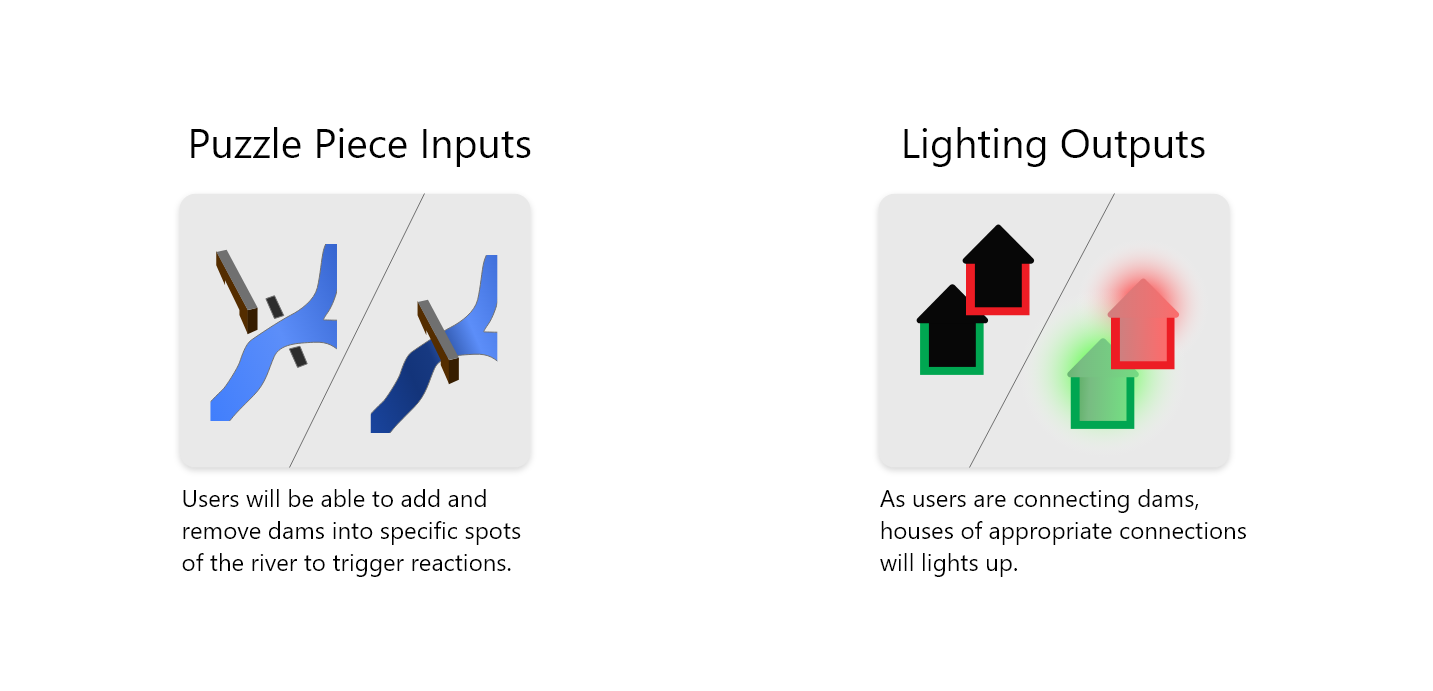
We realized that 3D components would both be easier to interact with and also create a more robust product that could be repaired easier. Not only did this also help in creating more intuitive touch points, but this also created a more tactile and memorable interaction that flat touch sensing.
Visual Design
Despite these efforts towards a more intuitive experience, we believed that signage and labeling was necessary to help give information about the product as well create a framework for challenges and puzzles. We utilized imagery as much as possible due tot he wide range of reading levels that our audience had.

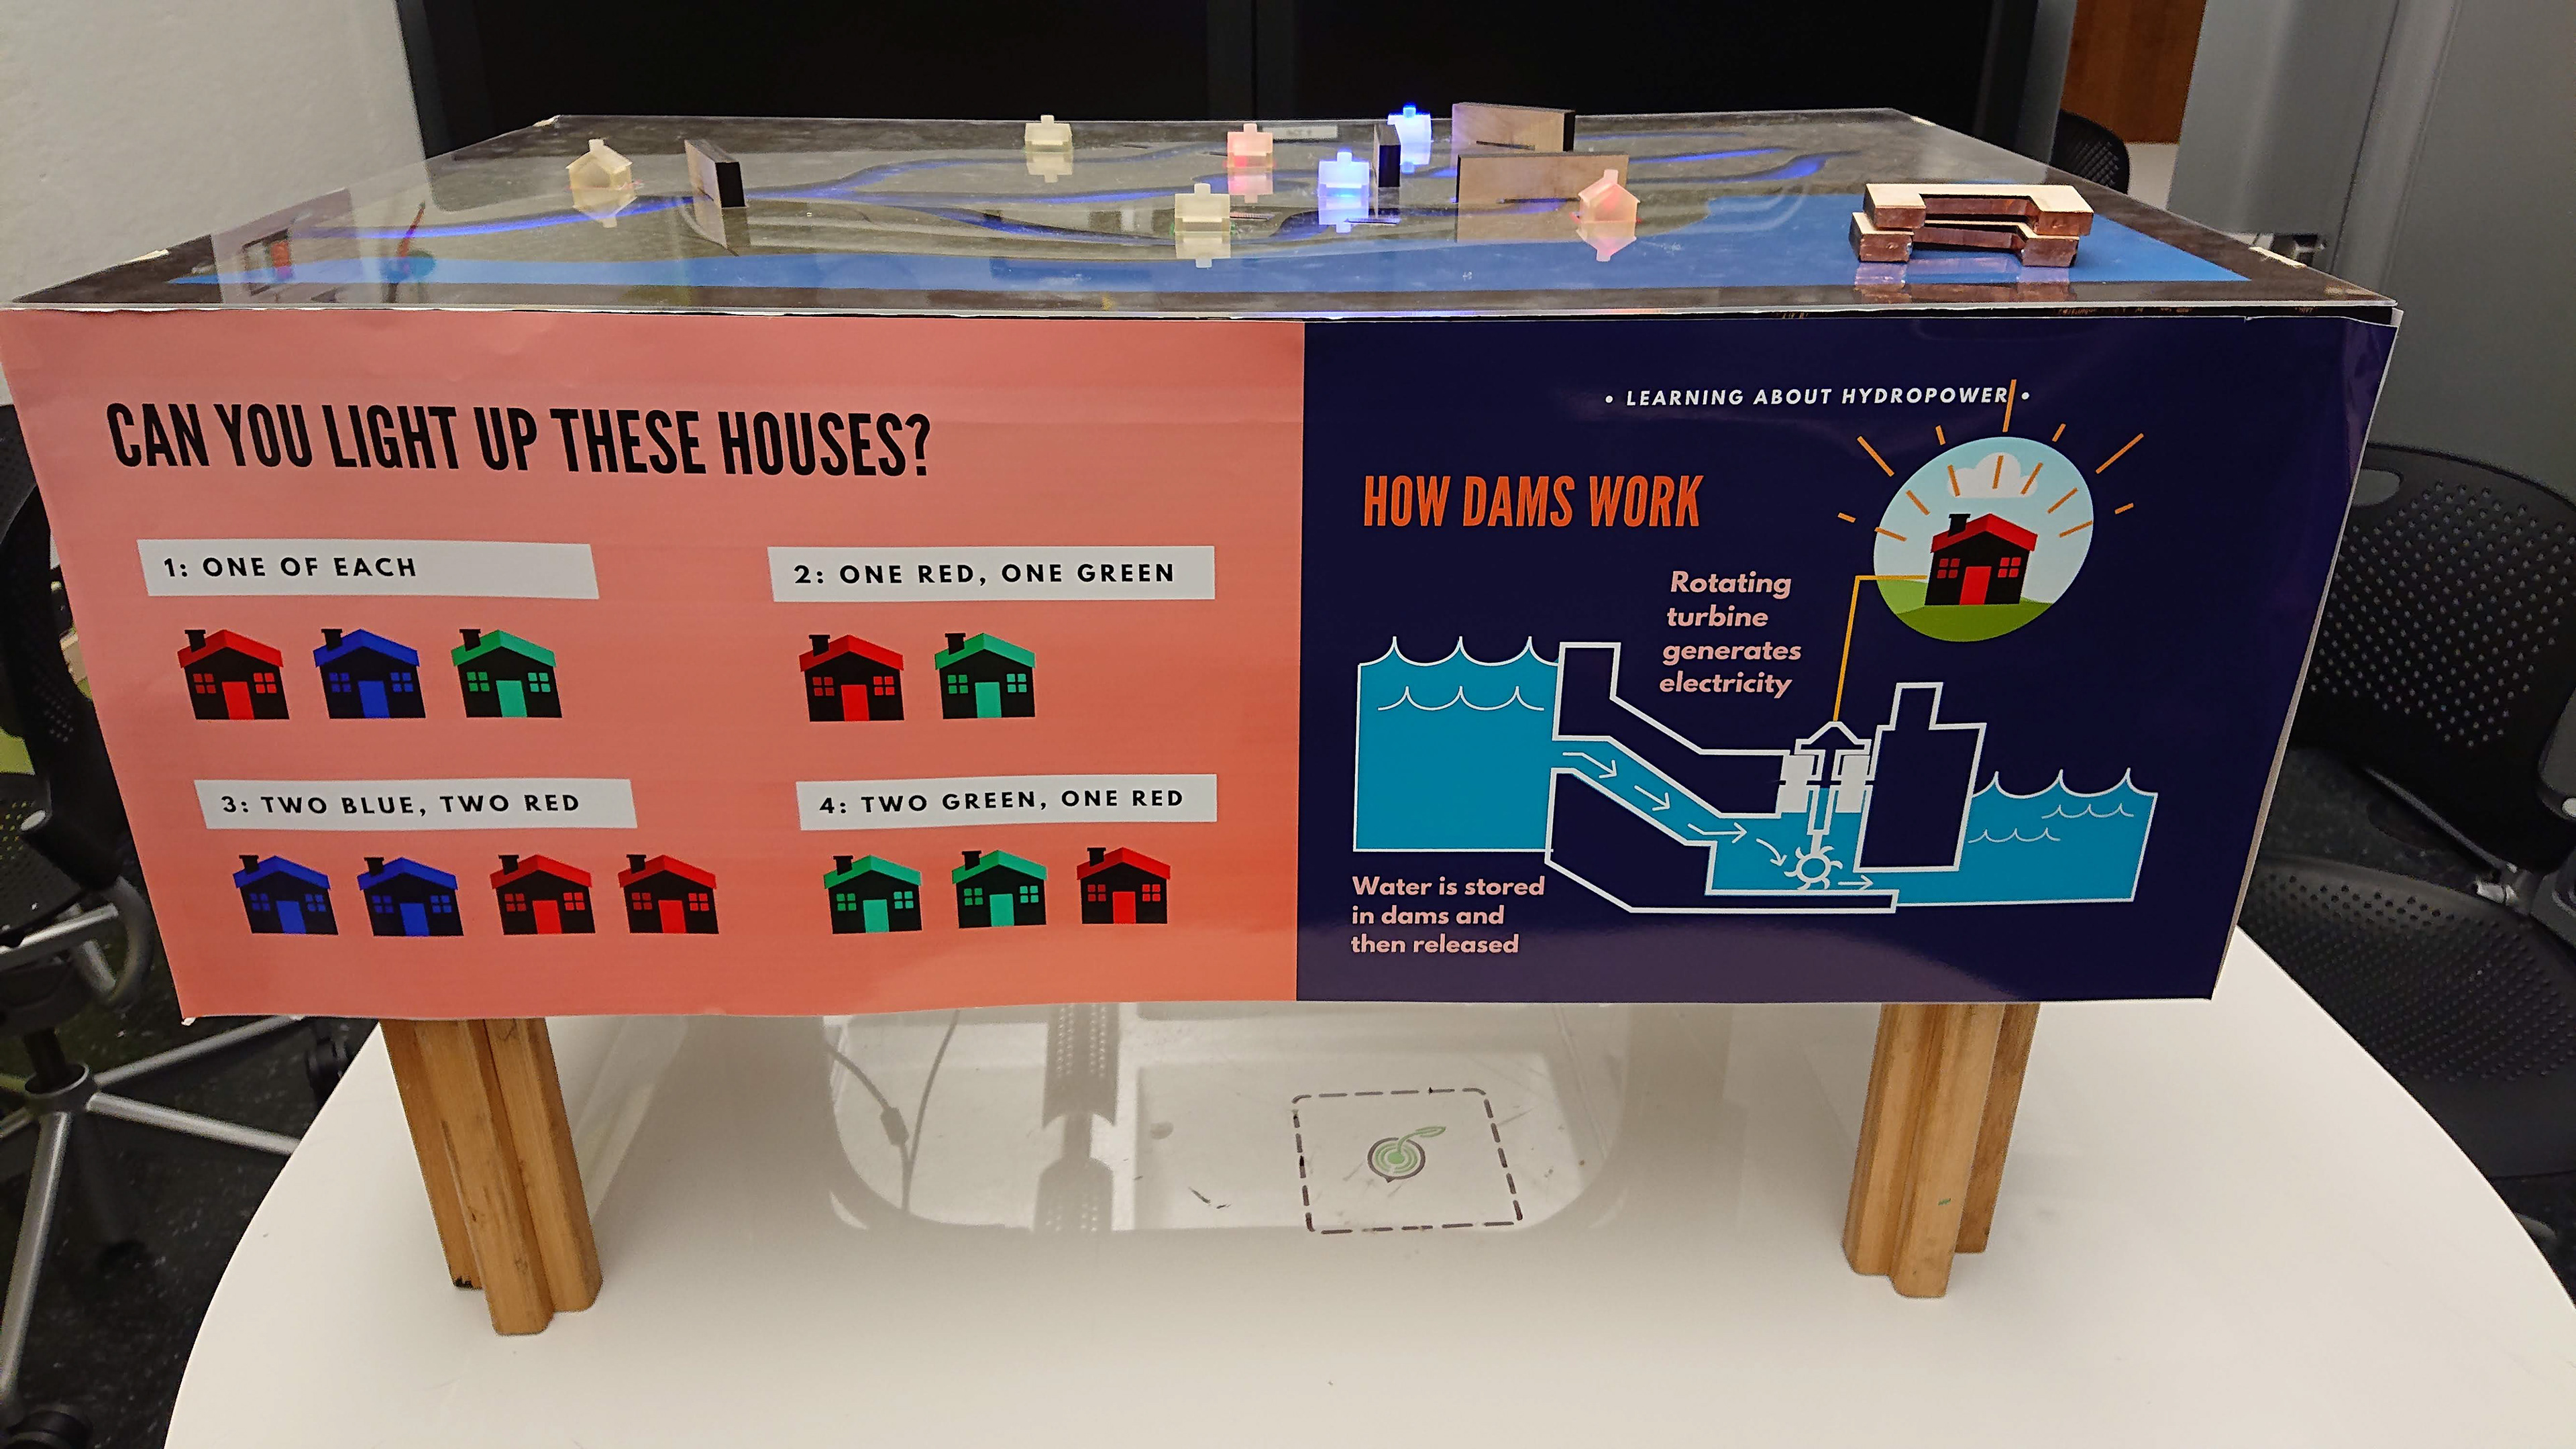
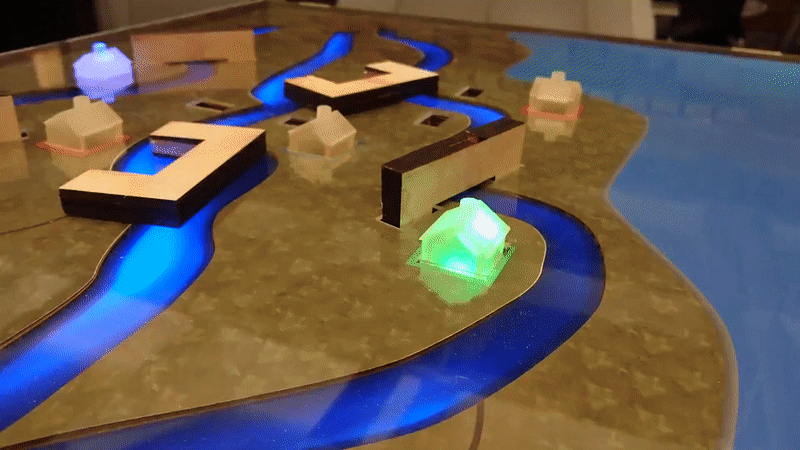
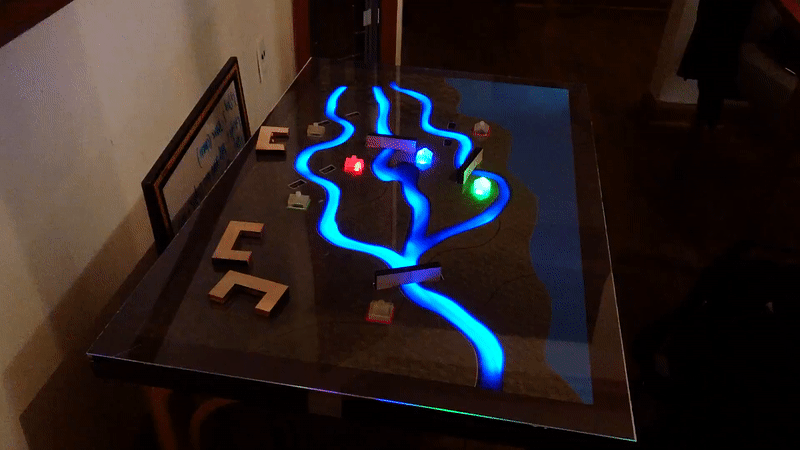
Final Prototype
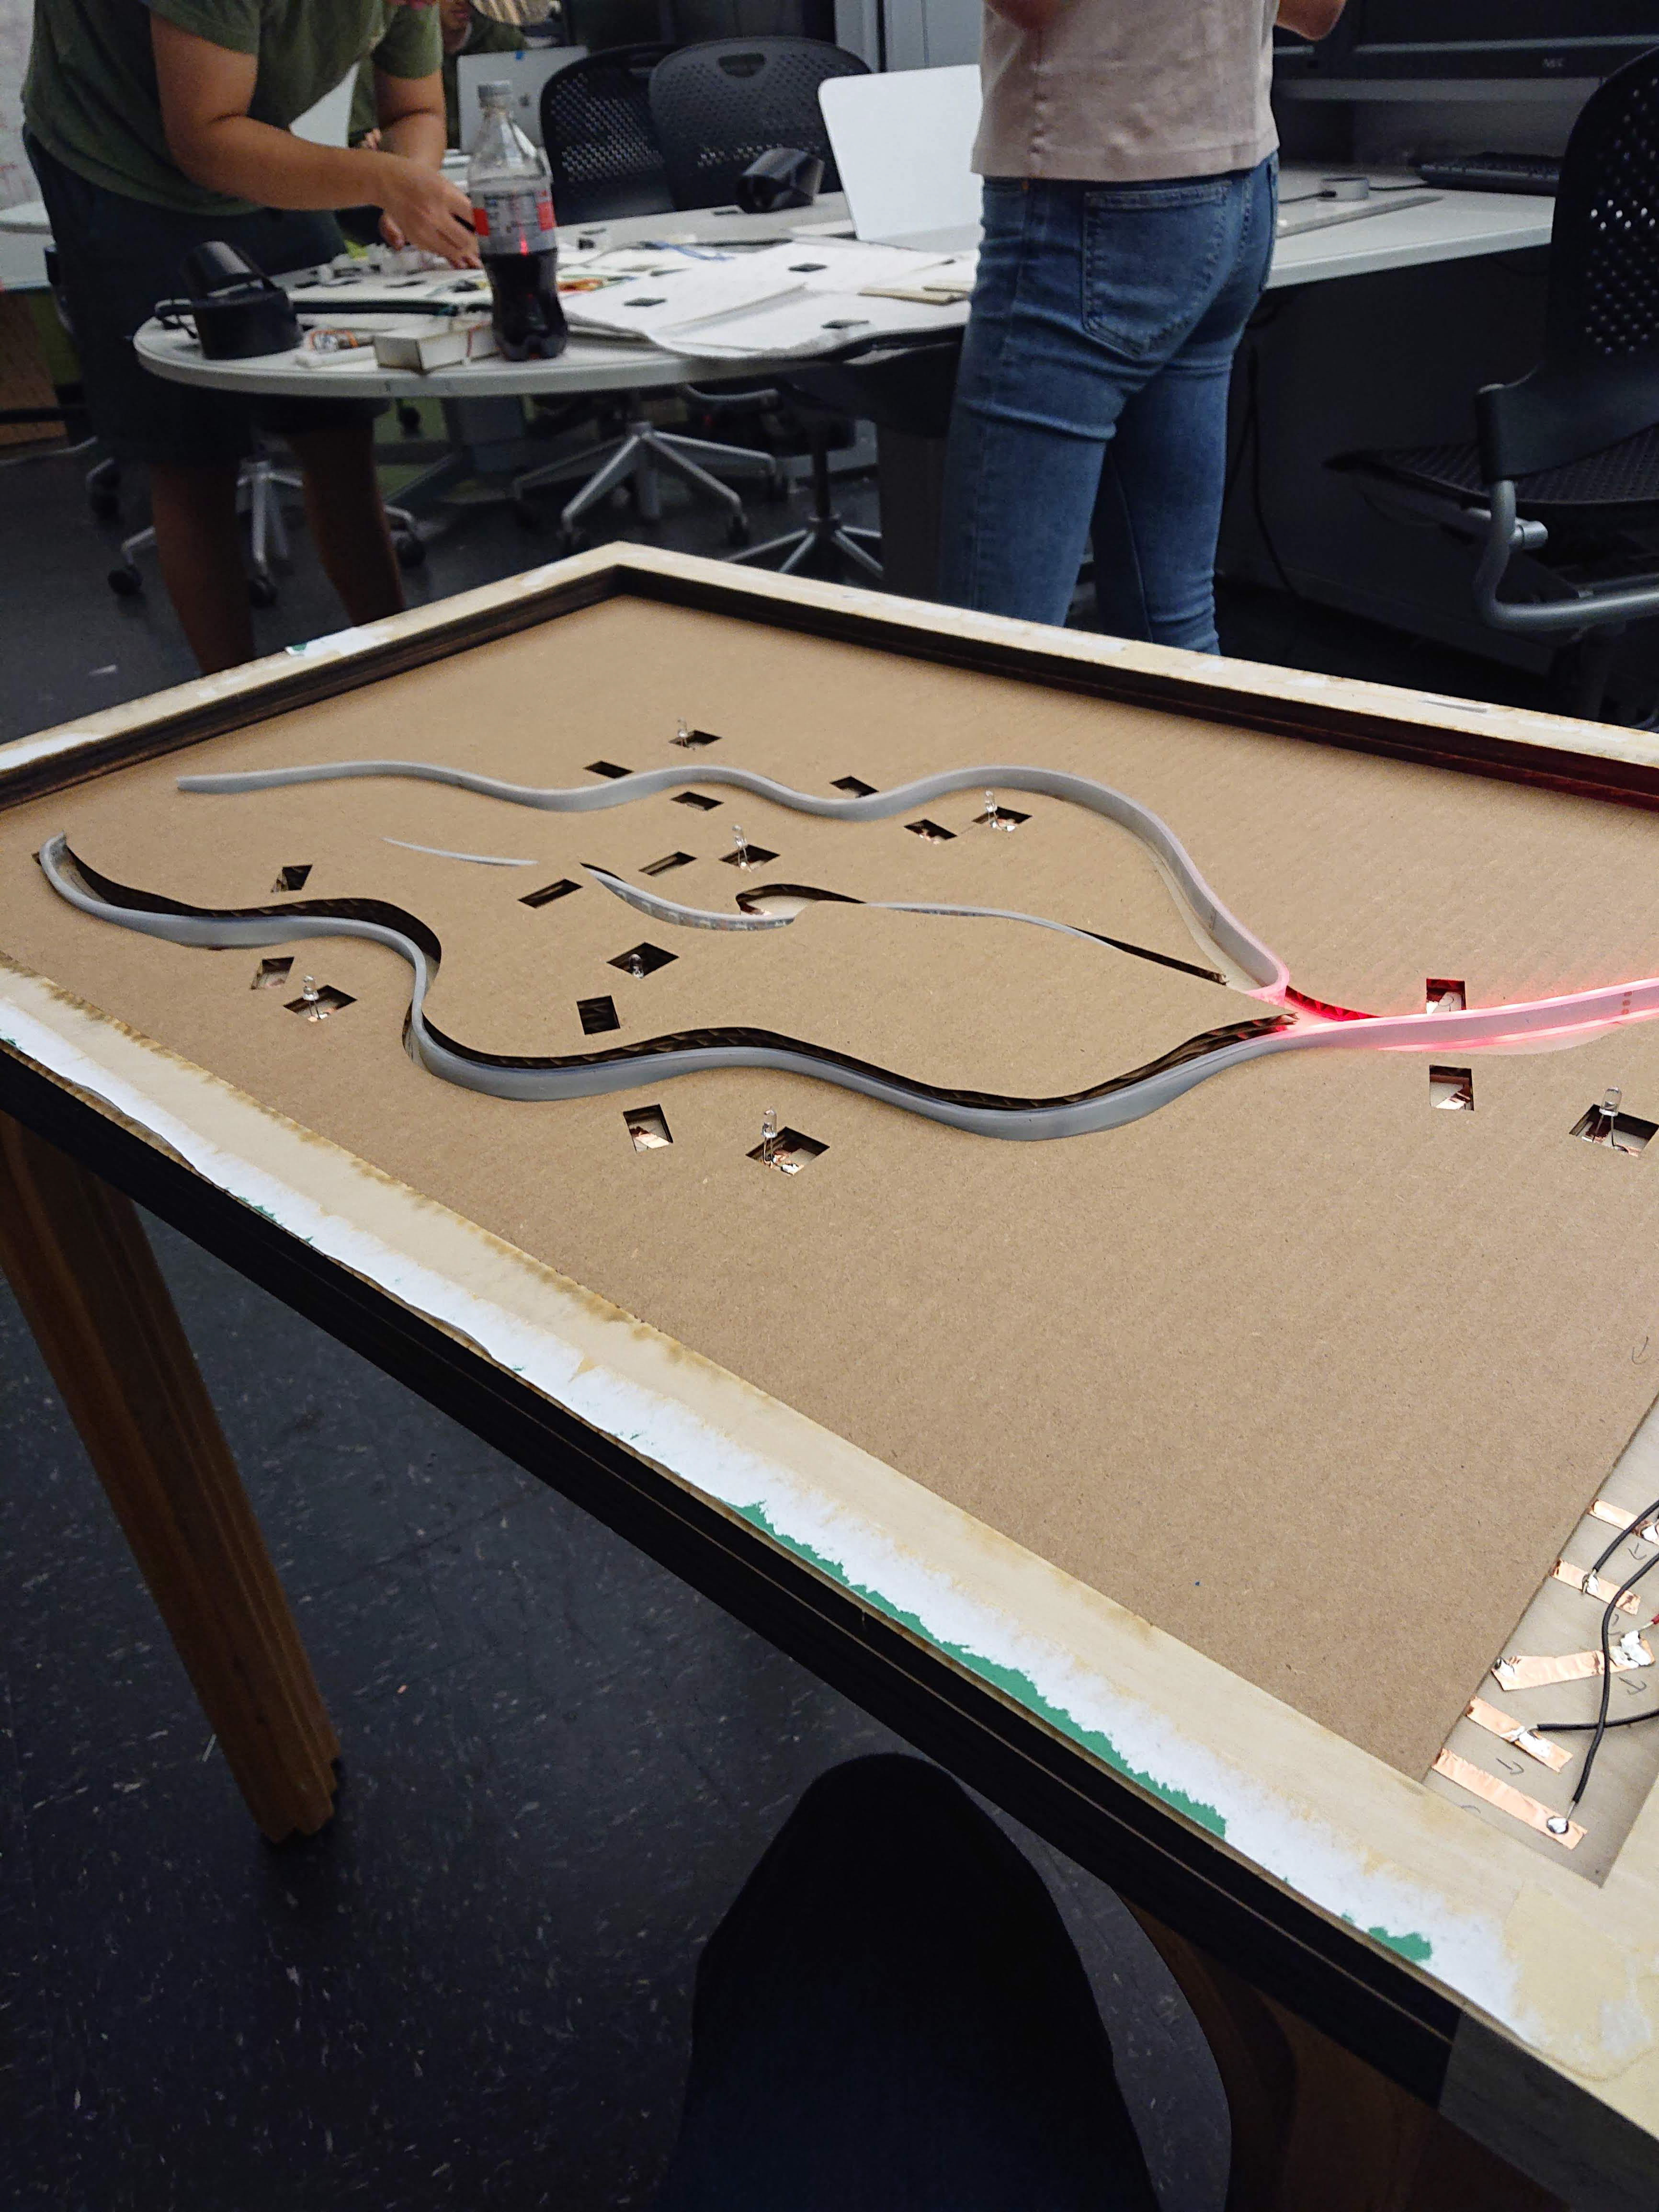
Recycling from our previous prototype, we replaced the cardboard with a overlay and river design. This continued to allow room for refinement as well as individual accessibility for each component. We began by creating an initial circuit from copper tape on the bottom layer of the table. This allowed for flexibility in prototyping as well as minimal footprint in such a tight space.
By utilizing this sandwich based approach, we were able to create a high fidelity prototype that retained a high level of flexibility between different designs. In order to change patterns, interactions components, or sensors, a user can simply replace the cardboard layer and replace the copper tape circuit to fit the new design.
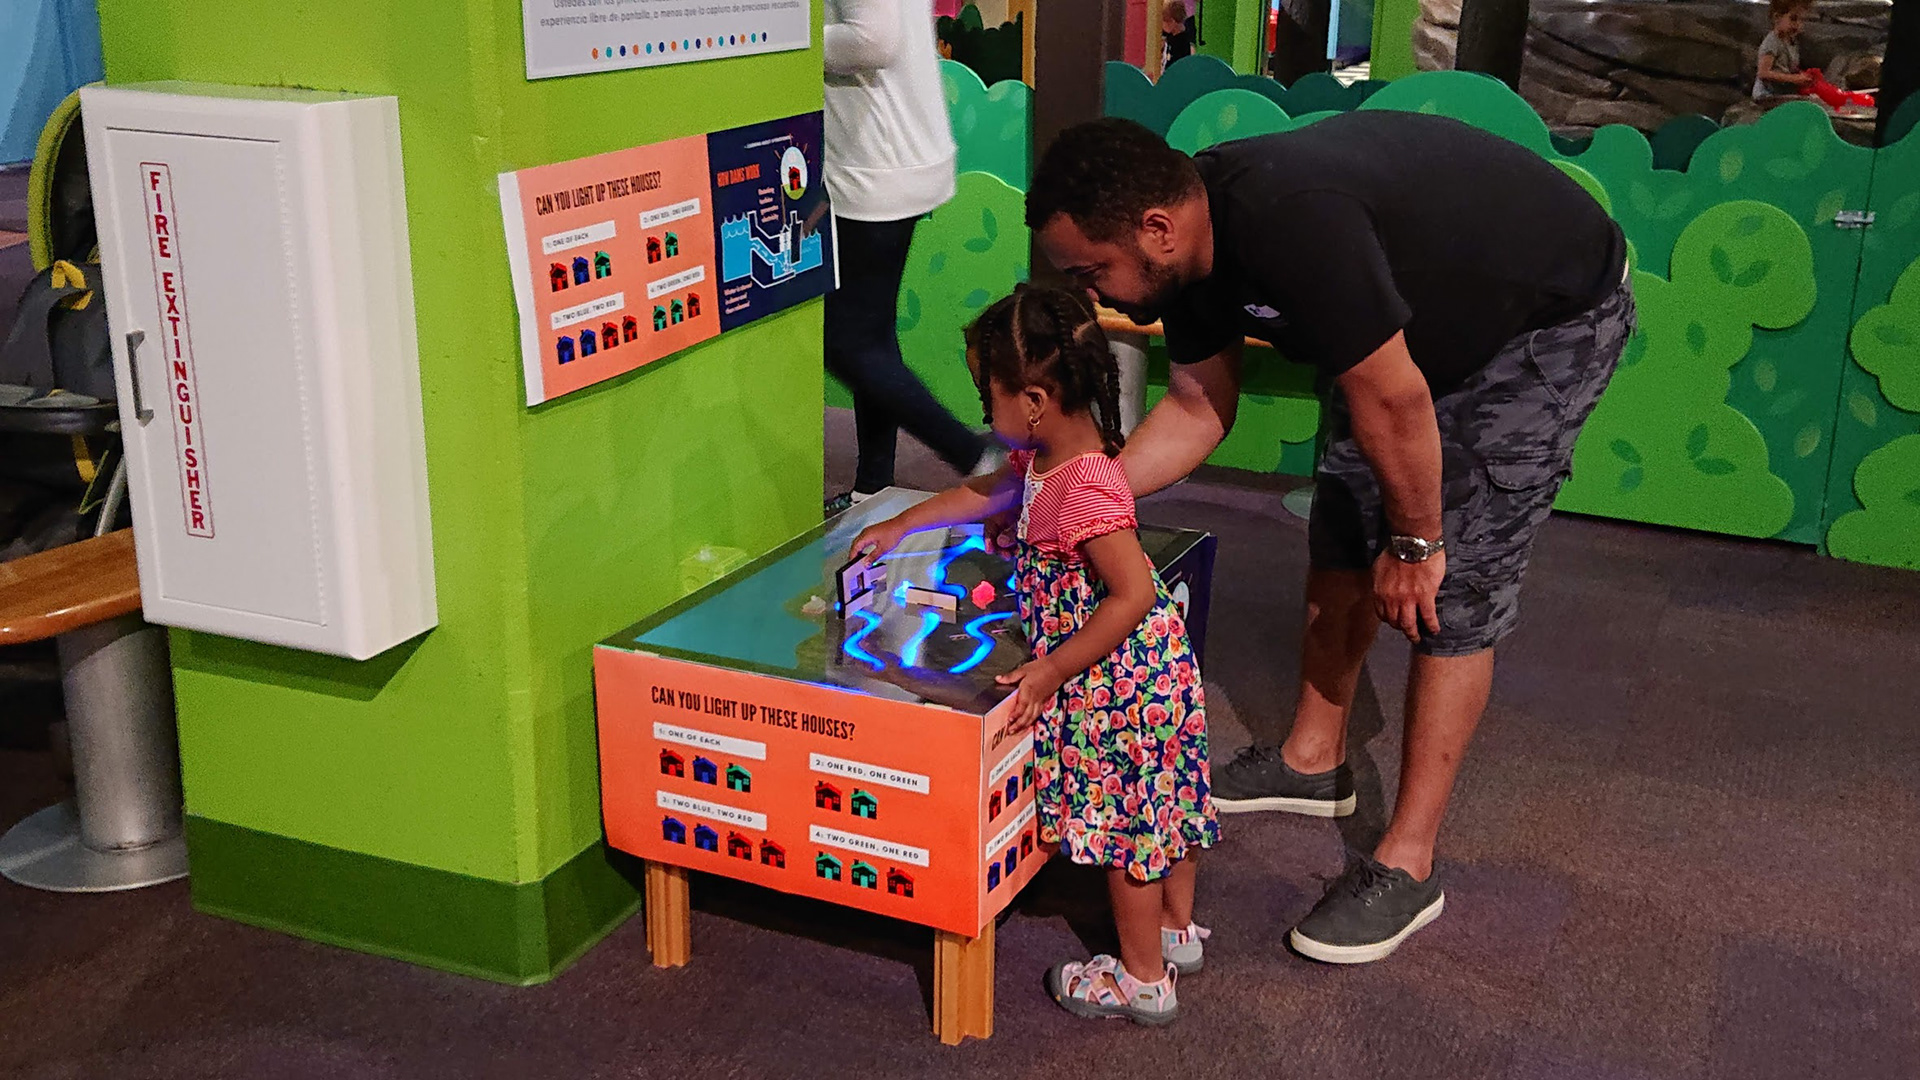
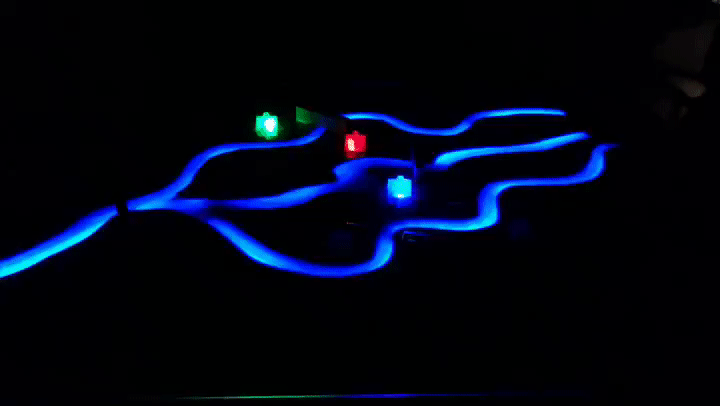
We used copper-coated wooden bridges as the inputs to the table while using 3D printed, crystal houses as the primary output. We were able to create a pretty glowing effect using LEDs underneath the crystal prints.
Sandwiching everything within a new design made of cardboard and acrylic, we used LED strips as an ambient effect as well as the primary attract.


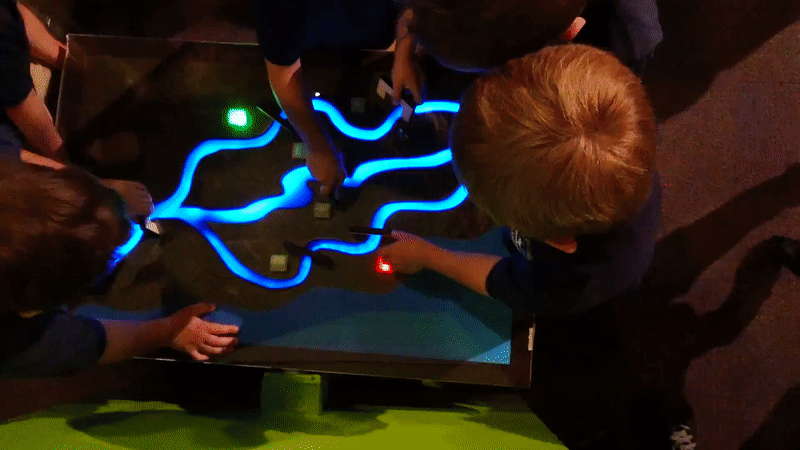
Live Demo
We performed a final round of user testing at the Children's Museum over the course of 4 hours in the morning. During this time, we used more modified think-aloud sessions with the various users that approached the project.


Reflecting
I absolutely loved doing this project. It allowed me to really focus on designing a non-traditional interaction and experience in the physical world in a short amount of time. This project was a large undertaking for the time and resources I had at this time of the year. Due to the rapid turnarounds and time constraints, this was a great opportunity to really refine prioritizing features and iteration outcomes. Without this mindset, I would have had extreme difficulty in focusing my efforts and gathering meaningful takeaways. This also allowed me to tackle the project piece by piece and divide my efforts into one area at a time, eventually creating a single cohesive experience. For self-centered reasons, this was also my first project where I was able to 3D print from this kind of printer, and I feel I was able to show where 3D printing and laser cutting could really shine and work together. Finishing it off now, I would love to further refine the interactions and take the visual quality up another level to truly complement the interactions.
Prototype with Reusability in Mind: This project would not have been at a proper level without creating an initial prototype framework that I could build off of. Knowing what framework I had already built, allowed a much easier and quicker time once visuals and pivoting interactions became the top priority. This allowed me to quickly create an entirely new experience without needing to spend much time figuring out how to fabricate it as well.